The Quickstart Guide
You are looking to integrate with the GoCardless API quickly? This guide will help you getting your first real bank account data in no time.
To get a more thorough understanding of this client and its capabilities, please refer to the full documentation, which will lead you through the different endpoints and their usage.
-
To get started install the package via the package manager:
Install-Package RobinTTY.NordigenApiClient -
Next you need to create a new instance of the client:
using var httpClient = new HttpClient();
var credentials = new NordigenClientCredentials("my-secret-id", "my-secret-key");
var client = new NordigenClient(httpClient, credentials); -
Then we need the list of banking institutions in your country (e.g. United Kingdom)
var institutionsResponse = await client.InstitutionsEndpoint.GetInstitutions(SupportedCountry.UnitedKingdom);
if (institutionsResponse.IsSuccess)
    institutionsResponse.Result.ForEach(institution =>
    {
        Console.WriteLine($"Institution: {institution.Name}, Id: {institution.Id}");
    });
else
Console.WriteLine($"Couldn't retrieve institutions, error: {institutionsResponse.Error.Summary}"); -
Choose the institution your bank account is registered with and create a requisition for it:
// Use the id of the bank you want to connect to here (we acquired it in the last step)
var institution = "BANK_OF_SCOTLAND_BOFSGBS1";
var redirect = new Uri("https://where-nordigen-will-redirect-after-authentication.com");
var requisitionResponse = await client.RequisitionsEndpoint.CreateRequisition(institution, redirect);

if (requisitionResponse.IsSuccess)
{
    Console.WriteLine($"Requisition id: {requisitionResponse.Result.Id}");
    Console.WriteLine($"Start authentication: {requisitionResponse.Result.AuthenticationLink}");
}

else
Console.WriteLine($"Requisition couldn't be created: {requisitionResponse.Error.Summary}"); -
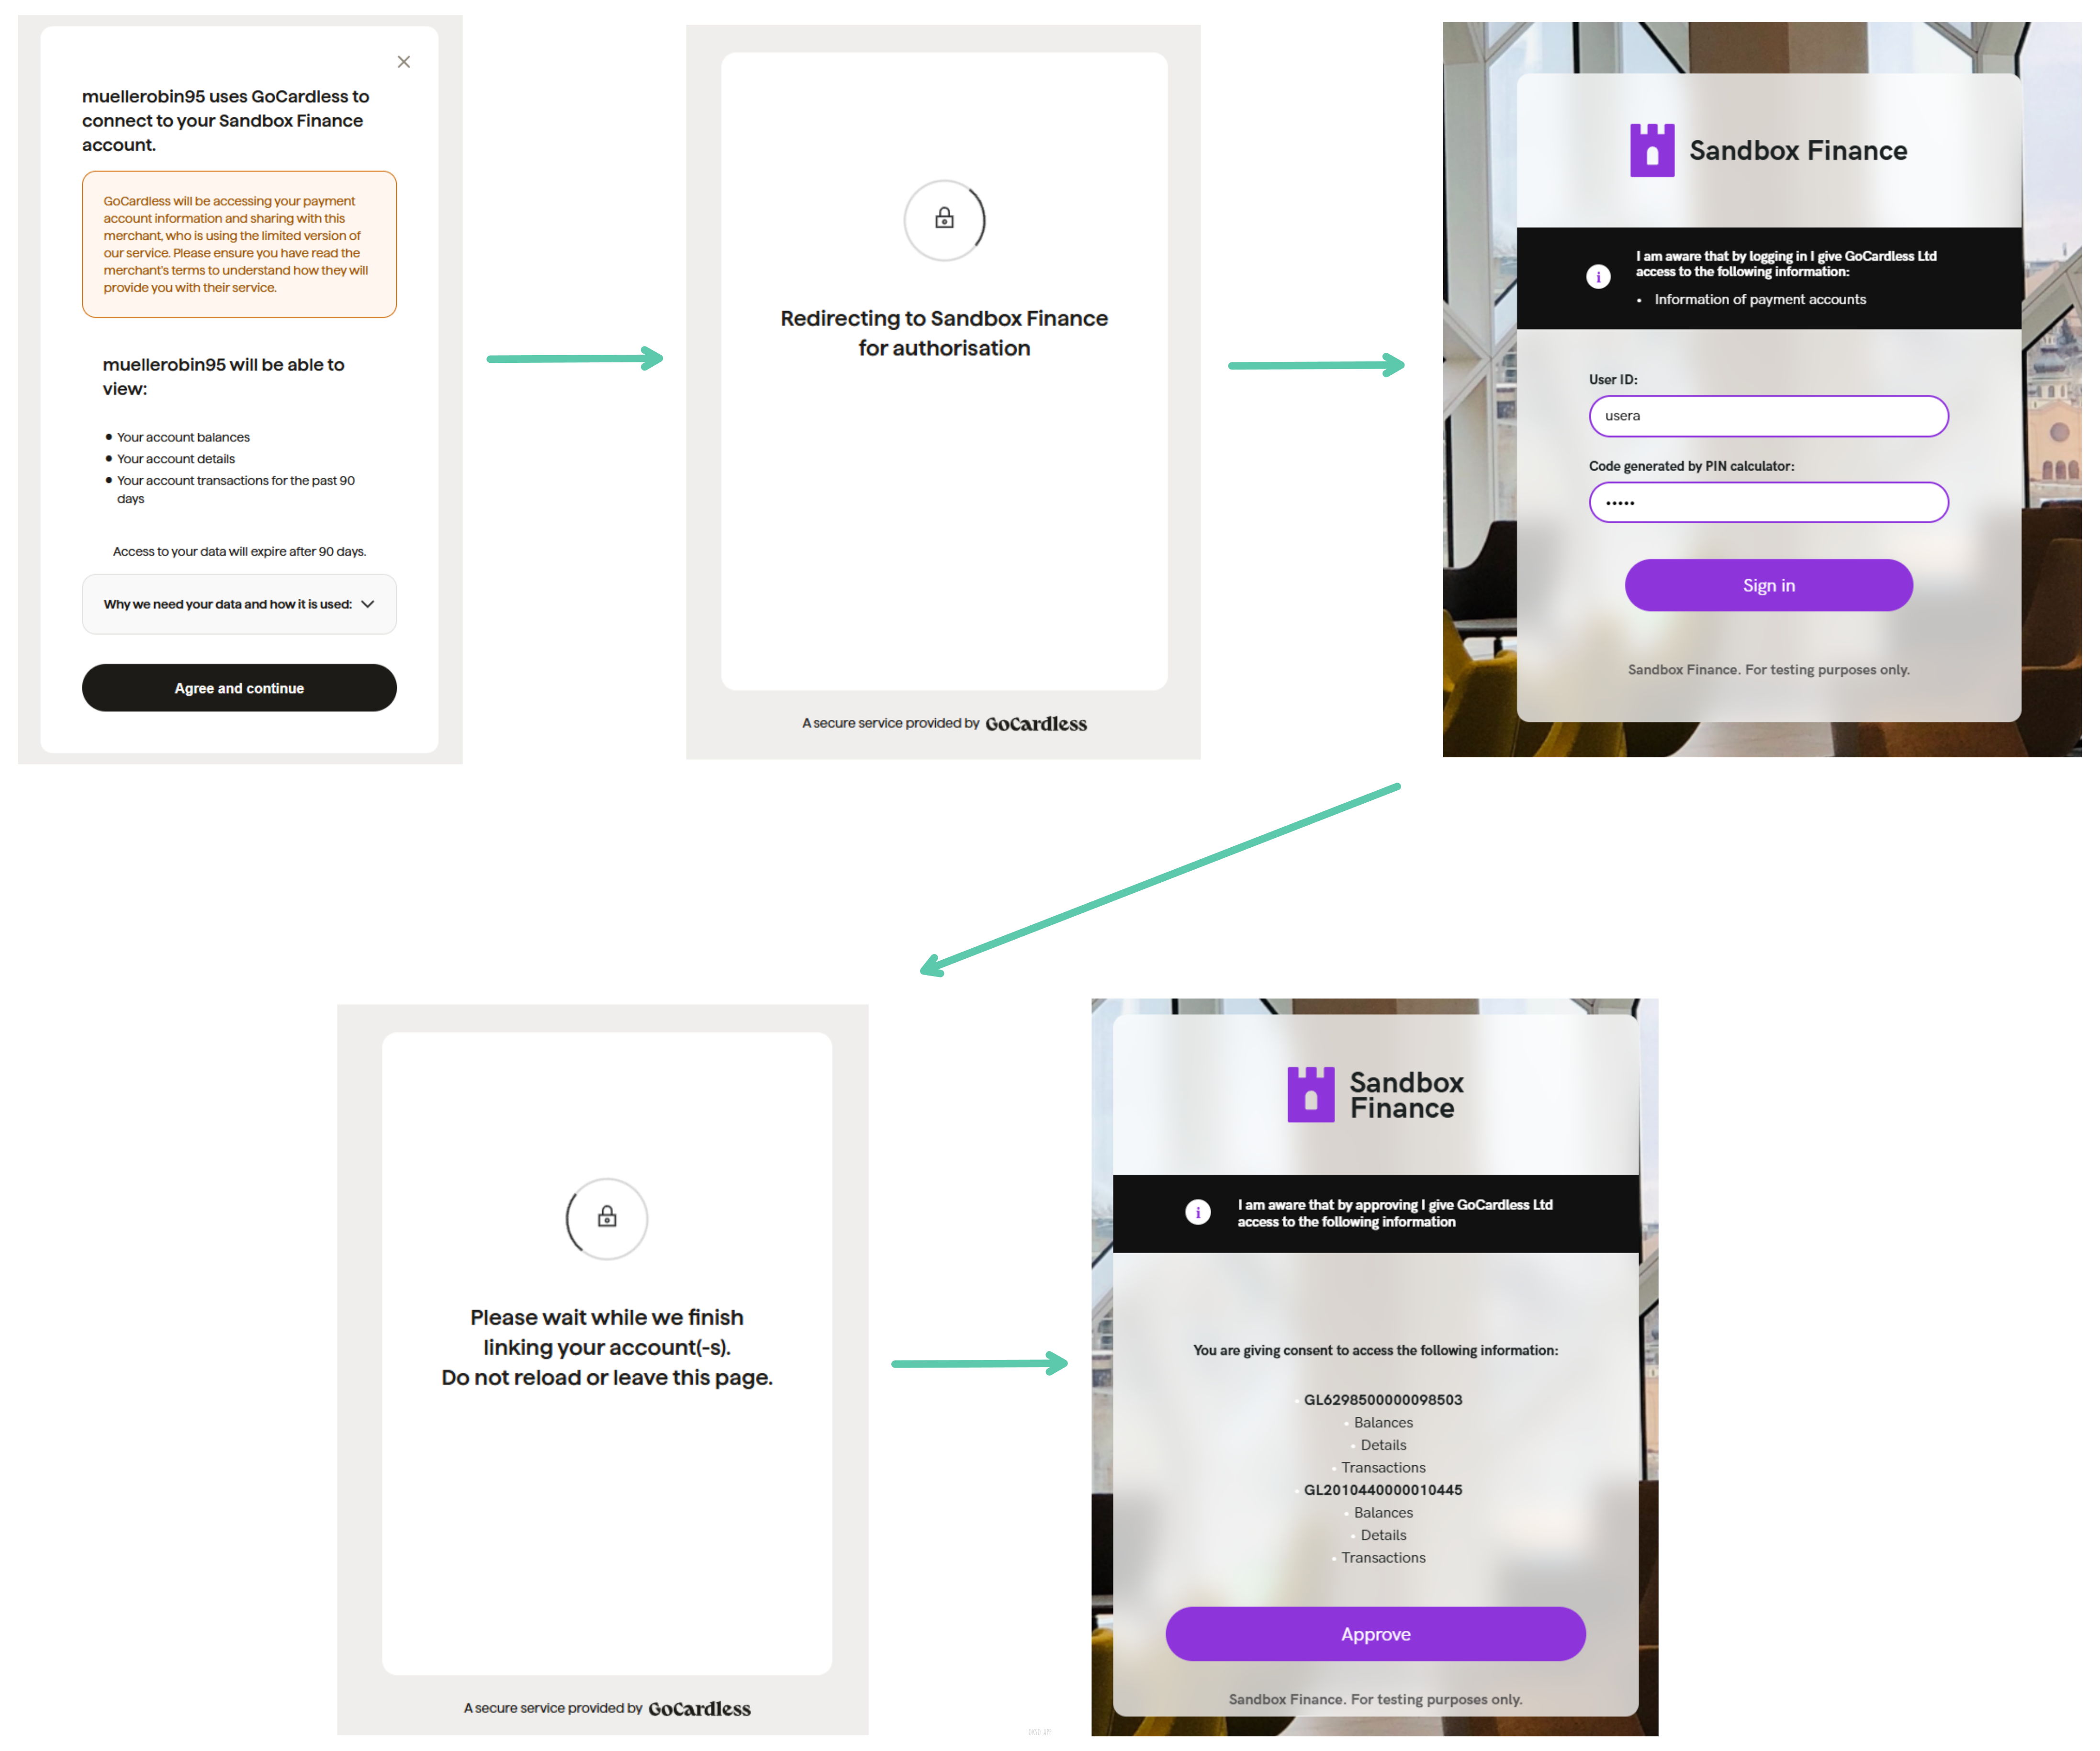
You will now need to accept the end user agreement by following the authentication link you got in the last step. The authentication flow will roughly look like this:

-
Now that you have accepted the agreement we once again need to retrieve the requisition we created in step 4. This time the response will include the accounts you are now able to access.
var requisitionId = "your-requisition-id";
var accountsResponse = await client.RequisitionsEndpoint.GetRequisition(requisitionId);
if (accountsResponse.IsSuccess)
    accountsResponse.Result.Accounts.ForEach(accountId =>
    {
        Console.WriteLine($"Account id: {accountId}");
    });
else
Console.WriteLine($"Accounts couldn't be retrieved: {accountsResponse.Error.Summary}"); -
Now you can retrieve details about your bank account and the balances/transactions using the account ID(s) we just acquired:
var accountId = "your-account-id";
var bankAccountDetailsResponse = await client.AccountsEndpoint.GetAccountDetails(accountId);
if (bankAccountDetailsResponse.IsSuccess)
{
    Console.WriteLine($"IBAN: {bankAccountDetailsResponse.Result.Iban}");
    Console.WriteLine($"Account name: {bankAccountDetailsResponse.Result.Name}");
}

var balancesResponse = await client.AccountsEndpoint.GetBalances(accountId);
if (balancesResponse.IsSuccess)
    balancesResponse.Result.ForEach(balance =>
    {
        var balanceAmount = balance.BalanceAmount;
        Console.WriteLine($"Type: {balance.BalanceType}");
        Console.WriteLine($"Balance: {balanceAmount.Amount} {balanceAmount.Currency}");
    });

var transactionsResponse = await client.AccountsEndpoint.GetTransactions(accountId);
if (transactionsResponse.IsSuccess)
    transactionsResponse.Result.BookedTransactions.ForEach(transaction =>
    {
        var transactionAmount = transaction.TransactionAmount;
        Console.WriteLine($"Remittance: {transaction.RemittanceInformationUnstructured}");
        Console.WriteLine($"Booking date:{transaction.ValueDate}");
        Console.WriteLine($"Amount: {transactionAmount.Amount} {transactionAmount.Currency}");
    });
That's it! You are now able to retrieve the account details, balances and transactions of your bank account. If you wanna learn more about this library please refer to the full documentation.