Jupyter Hub
What JupyterHub does (from the Jupyter Website)
JupyterHub brings the power of notebooks to groups of users. It gives users access to computational environments and resources without burdening the users with installation and maintenance tasks.
Running JupyterHub on a Server
JupyterHub can be deployed in different ways for different kind of needs. "The Littlest JupyterHub" or "TLJH" is a deployment option for 1-100 users.
Deploying this environment trough docker is not possible as stated on the Jupyter website.
Running TLJH inside a docker container is not supported, since we depend on systemd.
Requirements
- A server running Ubuntu 18.04 where you have root access (Ubuntu 19.10 works too/other versions not tested)
- 768MB RAM
- ssh & shell access
Steps to Install TLJH
-
Using a terminal program, SSH into your server. This should give you a prompt where you can type commands.
-
Make sure you have python3, python3-dev, curl and git installed.
sudo apt install python3 python3-dev git curl -
Get the TLJH code and determine the admin user who will be able to set up JupyterHub
curl https://raw.githubusercontent.com/jupyterhub/the-littlest-jupyterhub/master/bootstrap/bootstrap.py | sudo -E python3 - --admin <admin-user-name> -
Login with your Admin user (this step sets your password)
Adding Users
- Goto Control Panel -> Admin -> Add User
- You can add several users, one per line
- They will set their password the first time they log in
User Permissions
- A user can spawn a terminal
- A user has no sudo rights
- A user can install pip packages with the --user option
Which user owns which process

- User "jupyter+ runs the spawned kernels (ipykernel_launcher) and a process for each user. The kernels are spawned after a user creates a notebook.
- Users are registered as standard (non-root) users in Linux
- Notebooks use the kernel
- Server which is used for each user is hosted in jupyterhub-singleuser
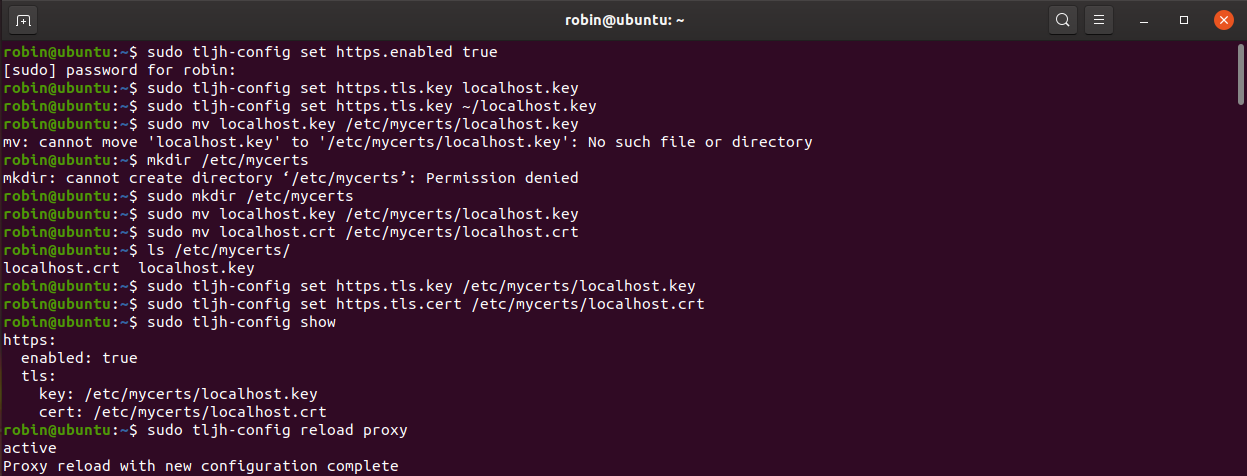
Enable HTTPS
Enabling HTTPS is relatively easy and can be done after the installation is finished.
The necessary shell commands are the following for the manual method:
sudo tljh-config set https.enabled true
sudo tljh-config set https.tls.key /etc/mycerts/mydomain.key
sudo tljh-config set https.tls.cert /etc/mycerts/mydomain.cert
sudo tljh-config reload proxy
The certificate path is an example and must be supplied with a valid path to the certificate/key which is to be used.
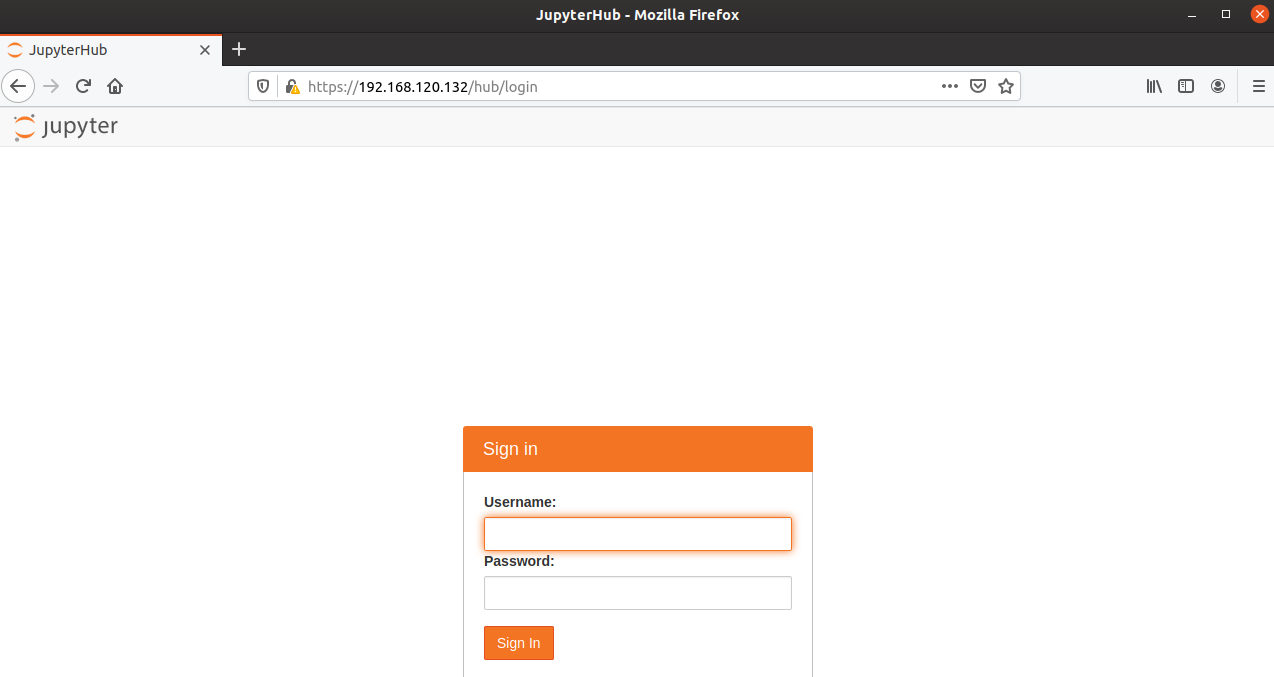
After completing this setup the Hub should be accessible by https.
The setup should look something like this:
Accessing the site should then look like this (notice the padlock and https connection):
Creating and managing different kernel/virtual environments
python -m ipykernel install --user --name=my-env-name
List available kernels:
jupyter kernelspec list
Show Server Logs
sudo journalctl -u jupyterhub
Stop JupyterHub
sudo service jupyterhub stop
Miscellaneous CLI Commands
- sudo service jupyterhub start
- sudo service jupyterhub stop
- sudo update-rc.d jupyterhub defaults (start on boot)